
How to Implement Dynamic Chat in Marketo
Adobe Dynamic Chat allows you to target your website visitors through an easy-to-use interface. By integrating Dynamic Chat with Marketo, you’ll be able to collect relevant content such as name and contact information and sort them straight into different Marketo programs and cross-channel activities. So how do you get started? We’re here to help!
1. Navigate to the integrations page of Adobe Dynamic Chat
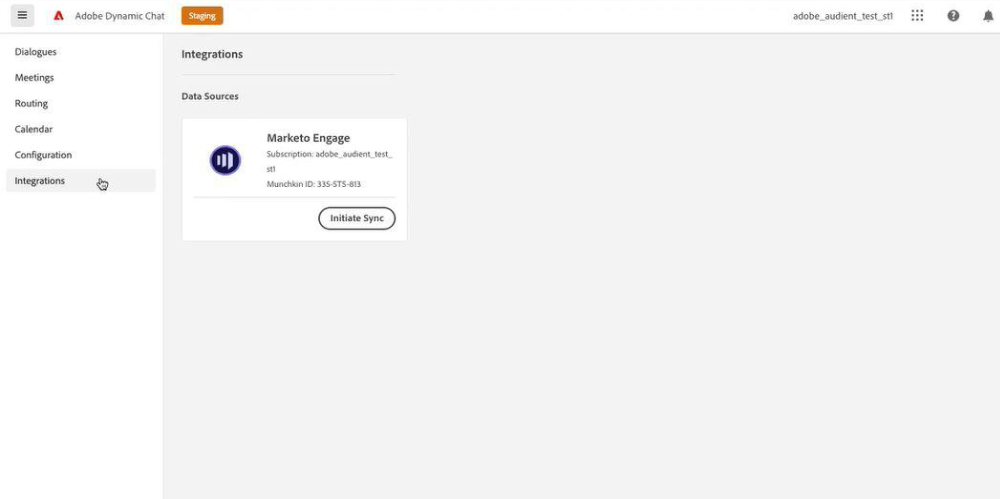
2. From here, click “Initiate Sync”
3. Select up to 50 custom or standard fields to sync with dynamic chat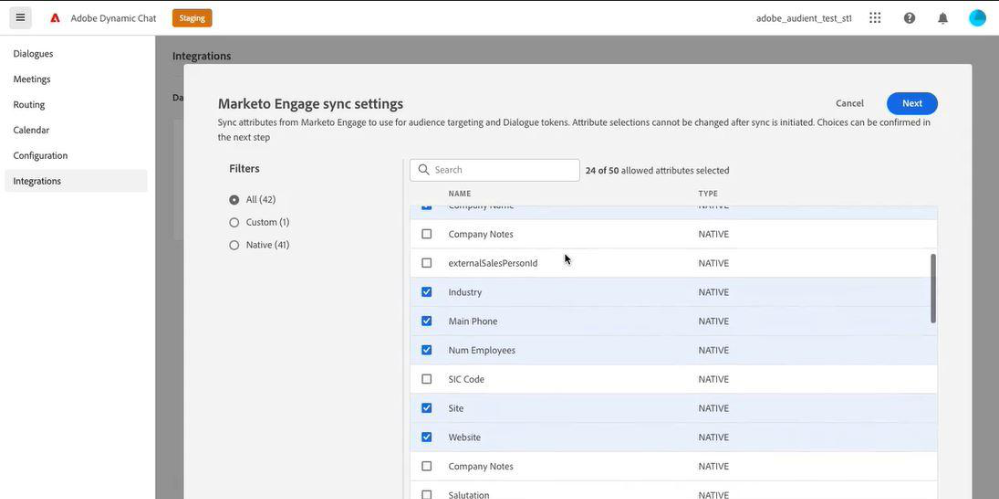
4. After clicking “Confirm”, depending on the size of the database, it could take 24 hours or
less to finalize the sync
5. Next, click on the configuration tab to set up your chat to select the color theme, font, and
positioning of your chatbot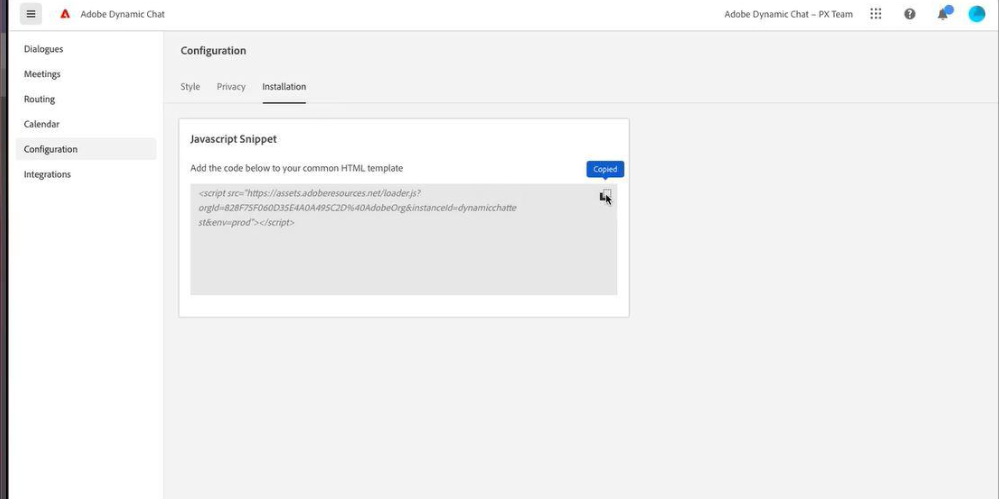
6. Then install the Dynamic Chat JavaScript on your website by navigating to the installation
tab within the configuration page
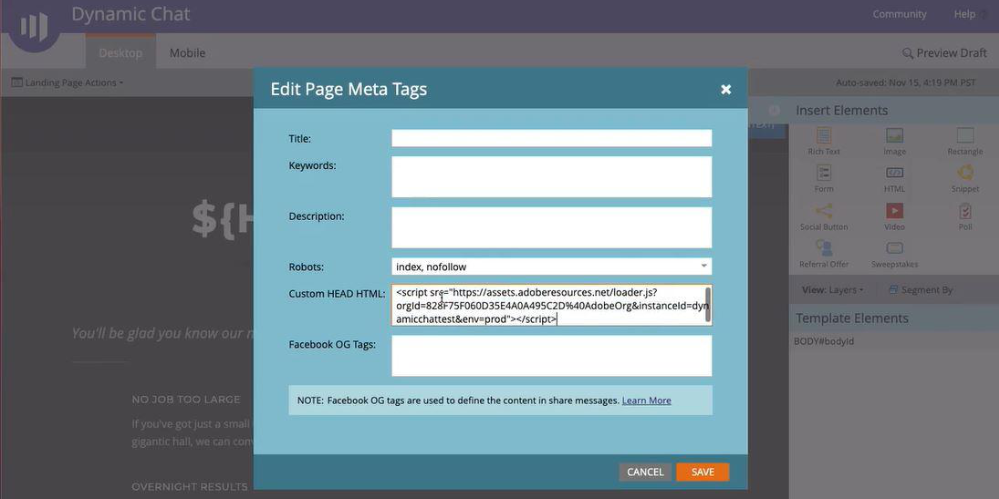
7. Add the snippet to the common HTML template of your site; you can also add it to
Marketo landing pages by inserting it into the “edit page meta tags” custom HEAD HTML
dialog box


Comments
No comment yet.